Abstract
In Evergreen version 2.5, you will be able to search multiple Z39.50 sources simultaneously from record buckets. Using this feature, you can match records from Z39.50 sources to catalog records in your bucket and import the Z39.50 records via Vandelay. Note that additional documentation for Vandelay can be found in the Evergreen Community’s Official Documentation located at
http://docs.evergreen-ils.org/
or in Equinox Software Inc’s documentation located at
http://www.esilibrary.com/esi/availableDocs.php
Administration
The following administrative interfaces will enable you to configure Z39.50 search parameters.
Z39.50 Index Field Maps
Click Admin → Server Administration → Z39.50 Index Field Maps to map bib record indexes (metabib fields and record attributes) in your catalog records to Z39.50 search attributes. Metabib fields are typically free form fields found in the body of a catalog record while record attributes typically have only one value and are often found in the leader.
You can map a metabib field or a record attribute to a Z39.50 attribute or a Z39.50 attribute type. To map a specific field in your catalog record to a specific field in a chosen Z39.50 source, you should map to a Z39.50 attribute. For example, if you want the Personal Author in your catalog record to map to the Author field when searching the Library of Congress, then you should do the following:
- Click New or double-click to edit an existing map.
- Select the Metabib Field from the drop down menu.
- Select the appropriate source and field from the Z39.50 Attribute drop down menu.
- Click Save.
Alternatively, if you want the Personal Author in your catalog record to map to the generic author field of any Z39.50 source, then you should do the following:
- Click New or double-click to edit an existing map.
- Select the Metabib Field from the drop down menu.
- Select the appropriate heading from the Z39.50 Attribute Type drop down menu.
- Click Save.
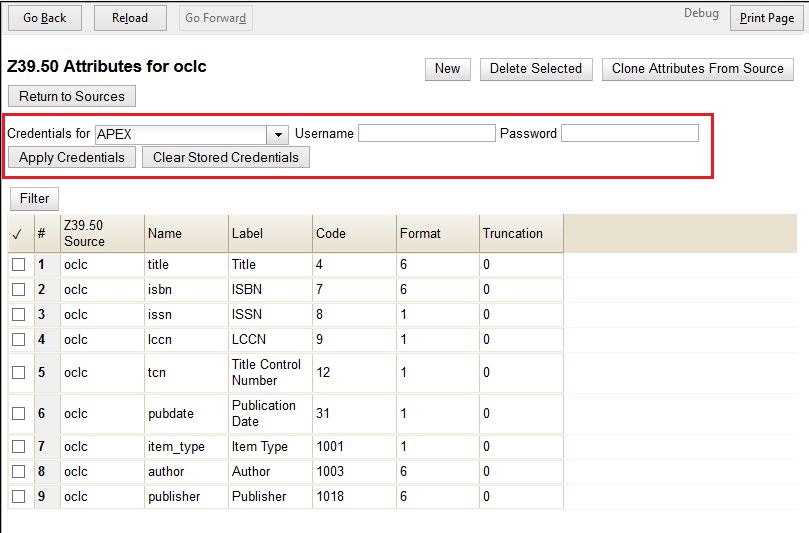
Z39.50 servers
Click Admin → Server Admin → Z39.50 Servers to input your Z39.50 server. Click the hyperlinked name of any server to view the Z39.50 search attribute types and settings. These settings describe how the search values (from a metabib field or record attribute) are translated into Z39.50 searches.
Apply Quality Sets to Z30.50 Sources
From this interface, you can rank the quality of incoming search results according to the match set that you have established and their Z39.50 point of origin. By applying a quality score, you tell Evergreen to merge the highest quality records into the catalog.
- Click Cataloging → MARC Batch Import/Export.
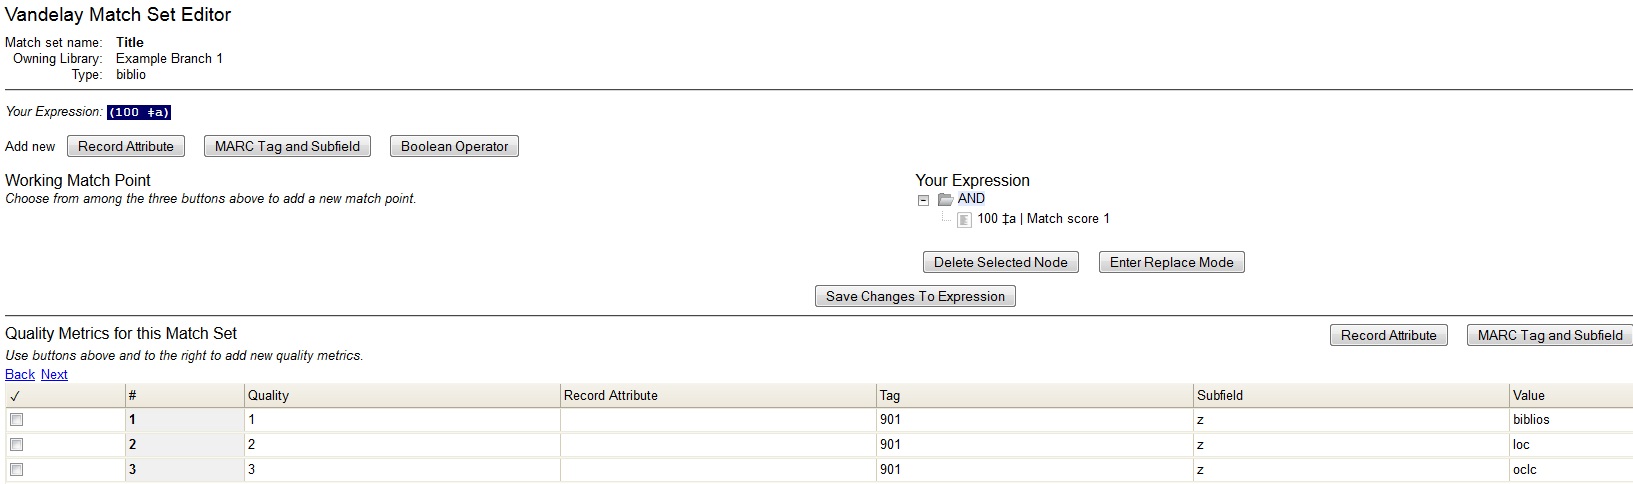
- Click Record Match Sets. Match Sets specify the MARC attributes, tags, and subfields that you want Evergreen to use to identify matches between catalog and incoming records.
- Rank the quality of the records from Z39.50 sources by adding quality metrics for the match set. Click MARC Tag and Subfield, and enter the 901z tag and subfield, specify the Z39.50 source, and enter a quality metric. Source quality increases as the numeric quality increases.
Org Unit Settings
Org Unit settings can be set for your local branch, your system, or your consortium. To access these settings, click Admin → Local Administration → Library Settings Editor → Maximum Parallel Z39.50 Batch Searches.
Two new settings control the Z39.50 search enhancements.
- Maximum Parallel Z39.50 Batch Searches – This setting enables you to set the maximum number of Z39.50 searches that can be in-flight at any given time when performing batch Z39.50 searches. The default value is five (5), which means that Evergreen will perform 5 searches at a given time regardless of the number of sources selected. The searches will be divided between the sources selected. Thus, if you maintain this default and perform a search using two Z39.50 sources, Evergreen will conduct five searches, shared between the two sources.
- Maximum Z39.50 Batch Search Results – This setting enables you to set the maximum number of search results to retrieve and queue for each record + Z39 source during batch Z39.50 searches. The default value is five (5).
Matching Records in Buckets with Records from Z39.50 Sources
- Add records to a bucket.
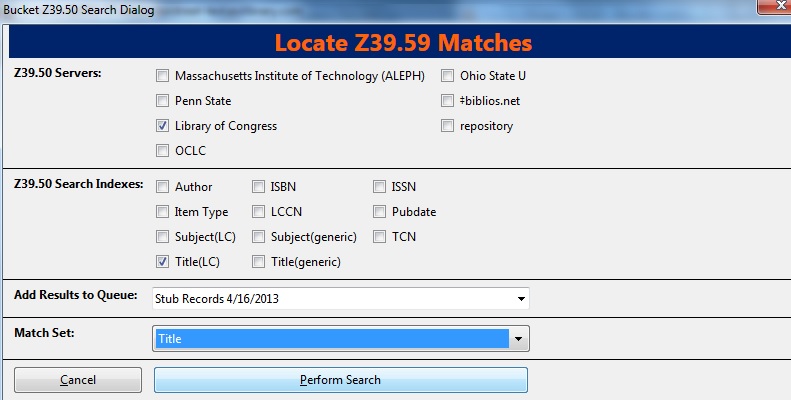
- Click Bucket Actions → Locate Z39.50 Matches. A pop up window will appear.
- Select a Z39.50 Server(s).
- Select a Z39.50 Search Index(es). Note that selecting multiple checkboxes will AND the search indexes.
- Select a Vandelay queue from the drop down menu to which you will add your results, or create a queue by typing its name in the empty field.
- Select a Match Set. The Match Set is configured in Vandelay and, in this instance, will only be used to compare the Z39.50 results with the records in your bucket.
- Click Perform Search.
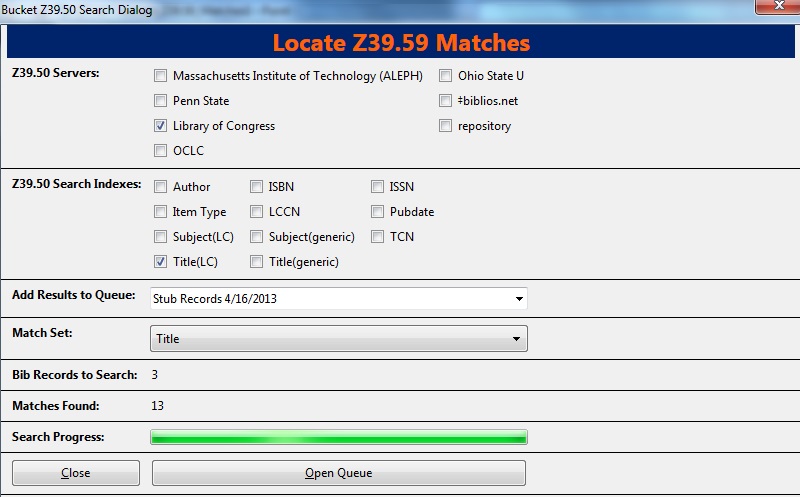
- Status information will appear, including the number of records in the bucket that were searched, the matches that were found, and the progress of the search. When the search is complete, click Open Queue.
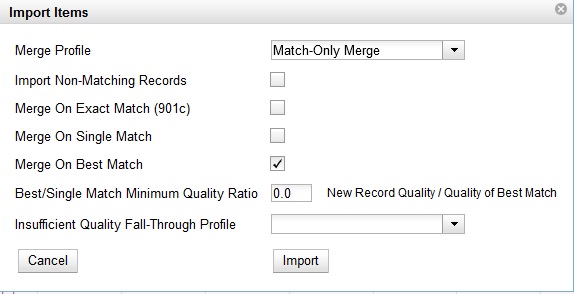
- The Vandelay Queue will display. Matching records are identified in the Matches column. From this interface, import records according to your normal procedure. It is suggested that to merge the incoming records with the catalog records, you should choose an option to import the records. Next, select either merge option from the drop down menu, click Merge on Best Match, and then click Import.
- The records from the Z39.50 search will merge with the catalog records. NOTE: A new column has been added to this interface to identify the Z39.50 source. When records are imported to the Vandelay queue via a record bucket, Evergreen tags the Z39.50 source and enters the data into the $901z.
Author: Sally Fortin, Athenaeum Educational Services